
Publishing your plan for an external audience
Publishing your plan for an external audience
When sharing your plan with an external audience, you may not want to share sensitive information such as employee names, phone numbers, etc. These instructions demonstrate how to use SHIELD to create a redacted version of your business continuity plan.
Part 1: Selecting content that should redacted.
- In the Supporting Data component of SHIELD, any column of data in any table can be marked as ‘sensitive’. By default, the following columns in the personnel table are marked as sensitive:
- First Name
- Known As
- Last Name
- SMS Phone Number
- When the ‘Redact Sensitive Information’ option is selected during publishing in SHIELD, any data from these columns that are used in the team membership or reports in SHIELD will be redacted in the pdf.
To mark additional columns as sensitive, do the following:
-
Login to your SHIELD account: https://shieldbcp.com.
-
Navigate to the “Supporting Data” Component.

-
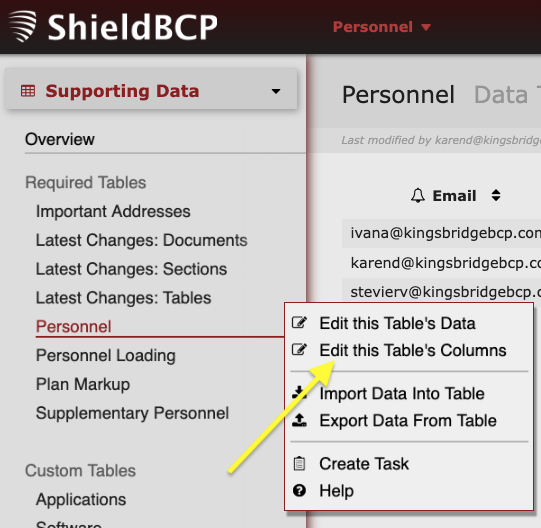
Select a table from the left.

-
Click the chevron next to the data table and select ‘Edit this Table’s Columns’.
-
Check the box next to ‘sensitive’ for any columns.

- Click ‘Save Changes’.


Part 2: Publishing your redacted plan
- Login to your SHIELD account: https://shieldbcp.com
-
Select a module or team from the list on the left.

-
Select what you would like to publish from the list on the left then click the chevron on the right.

-
From the resulting fly-out, click on “Publish this Team”.

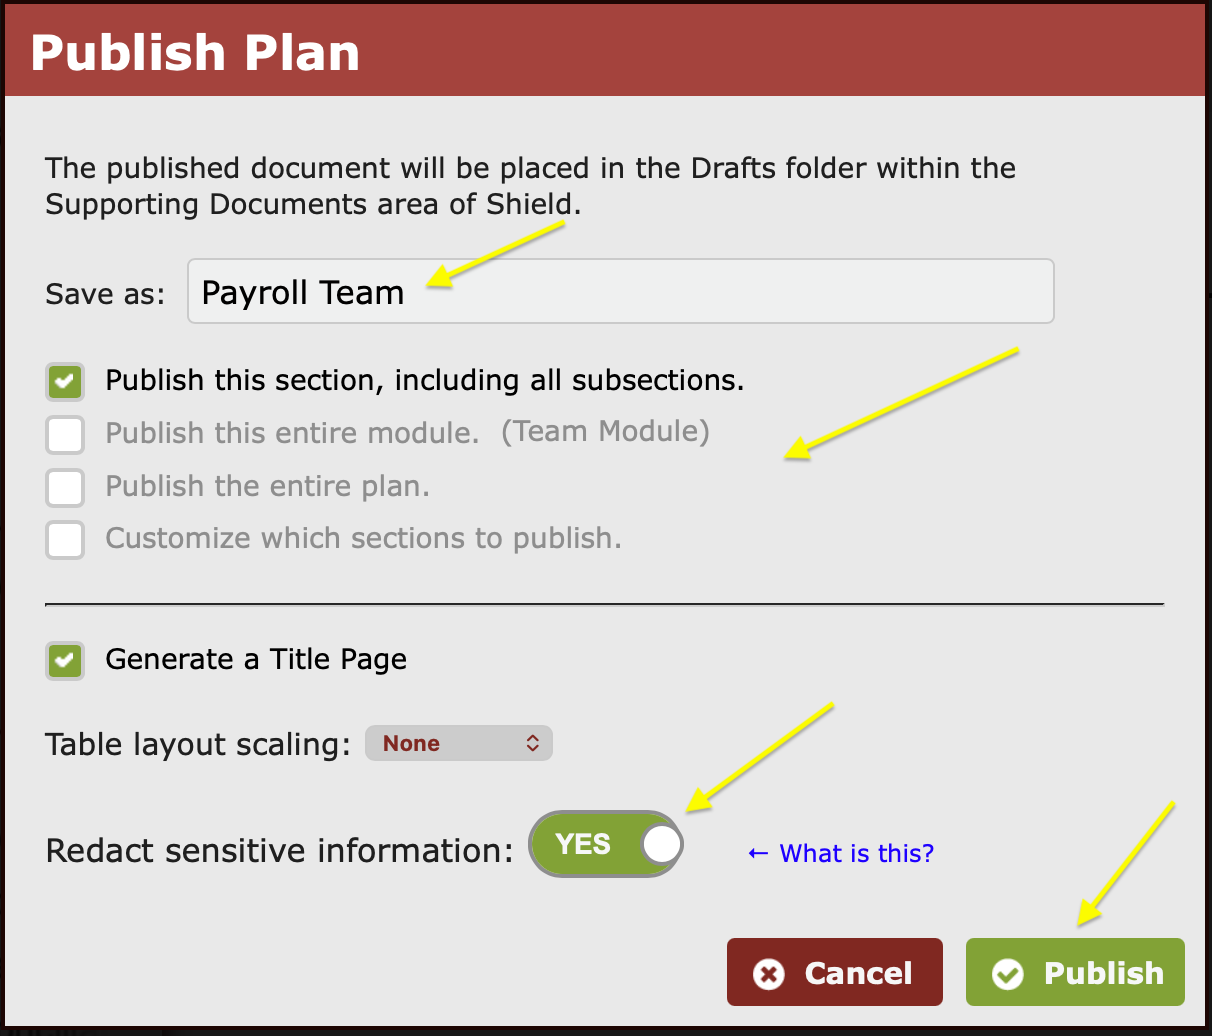
- Give the document you are about to publish a name (in this example, we called it Payroll Team) and choose from the publish option “Publish this section… entire module...", etc. In addition, click the red ‘No’ beside “Redact sensitive information:” so that it changes to a green ‘Yes’. This will ensure the following:
- All references to personnel names, email addresses and phone numbers that have been pulled into ‘My Plan’ from the personnel table (e.g. team membership and reports) will be obfuscated in the published document.
- This will also include any other data pulled into a report in ‘My Plan’ that has a column in the Supporting Data section that is marked as sensitive.
-
Finally, click ‘Publish.
-
SHIELD create a .PDF of your document. When you click “OK”, SHIELD takes you directly to the “Supporting Documents > Drafts” folder and highlights your newly created document.

- Use the chevron to the right of the document name and select “Download this Document”. The document will be downloaded to your computer. It can be printed, shared or saved from there.


